
Understanding Lower Cross Syndrome
Lower Cross Syndrome represents a constellation of postural and muscular imbalances, frequently linked to prolonged sitting and impacting overall biomechanics․
This predictable pattern predisposes individuals to discomfort and dysfunction, necessitating targeted interventions like specific lower cross syndrome exercises․
Addressing this syndrome involves a comprehensive approach, often detailed in resources like a lower cross syndrome exercises PDF, focusing on restoring balance․

What is Lower Cross Syndrome?
Lower Cross Syndrome isn’t a disease, but a pattern of muscle imbalance creating postural distortions․ It’s characterized by tightness in the hip flexors and lumbar extensors, coupled with weakness in the glutes and abdominal muscles – a crucial point often highlighted in a lower cross syndrome exercises PDF․
This imbalance manifests as an anterior pelvic tilt, exaggerating the natural curve of the lower back․ Prolonged sitting is a major contributor, essentially “shutting down” the glutes, leading to what some call “dead butt syndrome” or gluteal amnesia․ Consequently, the lower back muscles overcompensate, becoming chronically tight․
Understanding this interplay is vital․ A lower cross syndrome exercises PDF will typically emphasize exercises to re-activate the glutes and core, while simultaneously stretching the tight hip flexors․ This isn’t merely about aesthetics; it’s about restoring proper biomechanics and preventing pain, as detailed in many corrective exercise guides․
Causes and Risk Factors
The primary driver of Lower Cross Syndrome is prolonged sitting, a ubiquitous modern habit․ This sustained posture shortens hip flexors and weakens gluteal muscles, initiating the imbalance detailed in many lower cross syndrome exercises PDF guides․ However, it’s rarely a single cause․
Other contributing factors include poor posture, lack of physical activity, and even certain occupational demands requiring extended periods in a seated position․ Individuals with jobs involving a lot of driving or desk work are particularly susceptible․ A sedentary lifestyle exacerbates the problem, as muscles lose strength and flexibility․
Understanding these risk factors is crucial for prevention․ A lower cross syndrome exercises PDF often includes preventative strategies alongside corrective exercises․ Addressing these underlying causes – increasing movement, improving posture – is as important as the exercises themselves, promoting long-term stability and reducing recurrence․
Symptoms of Lower Cross Syndrome
Lower Cross Syndrome manifests through a variety of physical signs, often subtle initially․ A common presentation is an exaggerated lumbar lordosis – an excessive inward curve of the lower back․ This is frequently coupled with anterior pelvic tilt, where the pelvis rotates forward, creating a swayback appearance, often illustrated in a lower cross syndrome exercises PDF․
Pain is a frequent symptom, typically localized in the lower back, but can radiate to the hips and even the knees․ Weakness in the gluteal muscles and tightness in the hip flexors are hallmark characteristics․ Individuals may experience difficulty with activities requiring hip extension or core stability․

A comprehensive lower cross syndrome exercises PDF will often include a self-assessment checklist to help identify these symptoms․ Recognizing these early warning signs is vital for initiating corrective measures and preventing the condition from worsening, improving overall function and reducing discomfort․

Assessment & Diagnosis
Accurate assessment is crucial for identifying Lower Cross Syndrome, often utilizing postural analysis and muscle imbalance testing, detailed in a lower cross syndrome exercises PDF․
Postural Assessment
Postural assessment forms the initial step in diagnosing Lower Cross Syndrome, revealing characteristic patterns․ A trained professional observes from multiple views – anterior, posterior, and lateral – noting deviations from neutral alignment․ Common findings include increased lumbar lordosis (excessive inward curve of the lower back), anterior pelvic tilt (pelvis rotated forward), and rounded shoulders with a forward head posture․
This assessment isn’t merely visual; it involves palpation to identify muscle imbalances․ Tightness in the hip flexors and lumbar extensors, coupled with weakness in the glutes and abdominal muscles, are hallmarks․ Resources like a lower cross syndrome exercises PDF often include images illustrating these postural distortions, aiding self-assessment and understanding․ Observing gait and functional movements further clarifies the extent of the imbalance, guiding subsequent exercise selection and treatment planning․ Accurate postural analysis is fundamental for effective intervention․
Muscle Imbalance Testing
Muscle imbalance testing complements postural assessment, quantifying the strength and flexibility deficits characteristic of Lower Cross Syndrome․ Manual muscle testing (MMT) evaluates the contractile ability of key muscle groups – glutes, abdominals, hip flexors, and lumbar extensors․ Weakness is typically observed in the gluteus maximus and transversus abdominis, while hip flexors and erector spinae demonstrate tightness․
Functional movement screens, like the single-leg stance or overhead squat, reveal how these imbalances impact movement patterns․ A lower cross syndrome exercises PDF may detail specific tests and grading scales for assessing muscle function․ Length tests assess the range of motion and flexibility of tight muscles․ Identifying these specific weaknesses and tightnesses is crucial for designing a targeted exercise program․ This data informs the selection of strengthening and stretching exercises to restore optimal muscle balance and function․

Exercise Protocol: Strengthening
Strengthening exercises, often detailed in a lower cross syndrome exercises PDF, target weakened muscles like glutes and core to restore postural alignment․
These exercises are foundational for correcting imbalances and improving functional movement patterns․
Glute Bridges
Glute Bridges are a cornerstone exercise within a lower cross syndrome exercises PDF, directly addressing gluteal weakness – a primary characteristic of the syndrome․
To perform, lie supine with knees bent and feet flat on the floor, hip-width apart․ Engage your core and squeeze your glutes to lift your hips off the ground, creating a straight line from your knees to your shoulders․
Hold briefly at the top, focusing on maximal gluteal contraction, then slowly lower back down․ Proper form is crucial; avoid arching your lower back excessively․
Variations include single-leg glute bridges for increased challenge and banded glute bridges, adding resistance around the knees to further activate the gluteus medius․ Aim for 3 sets of 10-15 repetitions, focusing on controlled movements and full range of motion․ This exercise effectively strengthens the gluteus maximus, crucial for pelvic stability and proper posture․
Quadruped Hip Extensions
Quadruped Hip Extensions are frequently detailed within a lower cross syndrome exercises PDF as a vital exercise for activating and strengthening the gluteal muscles․
Begin on your hands and knees, ensuring your hands are directly under your shoulders and your knees are under your hips․ Maintain a neutral spine throughout the movement․
Keeping your knee bent at a 90-degree angle, lift one leg back and up towards the ceiling, squeezing your glutes at the top of the movement․ Avoid arching your lower back or rotating your hips․
Slowly lower the leg back to the starting position․ Focus on controlled movements and engaging the glutes throughout․ Perform 3 sets of 10-15 repetitions per leg․ This exercise targets the gluteus maximus and hamstrings, helping to counteract the inhibited gluteal function common in Lower Cross Syndrome․
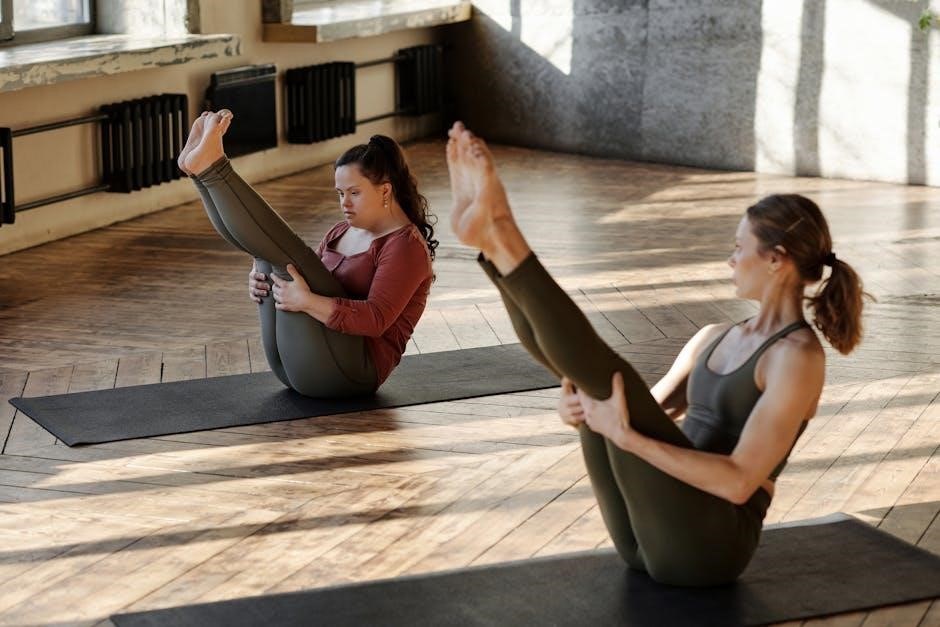
Plank Variations
Plank Variations are often included in a comprehensive lower cross syndrome exercises PDF, serving to enhance core stability and address the postural imbalances associated with the syndrome․
Begin with a standard plank, maintaining a straight line from head to heels, engaging your core, and avoiding sagging or hiking of the hips․ Hold for 30-60 seconds, repeating 3 times․
Progress to side planks, supporting your weight on one forearm and the side of one foot, keeping your body in a straight line․ Hold for 30-60 seconds per side, 3 repetitions․
Introduce plank with hip dips, gently lowering your hips towards the floor and then returning to the starting position․ Perform 10-15 repetitions per side․ These variations strengthen the transverse abdominis, obliques, and lower back, crucial for supporting the spine and improving posture․
Bird Dog Exercise
The Bird Dog Exercise is a foundational component frequently detailed within a lower cross syndrome exercises PDF, designed to improve core stability, spinal alignment, and coordination – all vital for correcting imbalances․
Start on your hands and knees, ensuring your hands are directly under your shoulders and your knees under your hips․ Engage your core to maintain a neutral spine․
Simultaneously extend one arm forward and the opposite leg backward, keeping your hips and shoulders square to the floor․ Avoid arching your back or rotating your torso․
Hold for a few seconds, then return to the starting position and repeat on the other side․ Perform 10-15 repetitions per side․ This exercise strengthens the glutes, lower back, and abdominal muscles, promoting a more balanced and functional movement pattern․
Exercise Protocol: Stretching & Mobility
Stretching and mobility work, often outlined in a lower cross syndrome exercises PDF, targets tight hip flexors, hamstrings, and the thoracic spine for improved posture․
Hip Flexor Stretches
Hip flexor tightness is a hallmark of Lower Cross Syndrome, significantly contributing to anterior pelvic tilt and postural imbalances․ A comprehensive lower cross syndrome exercises PDF will invariably include several hip flexor stretches․
Kneeling Hip Flexor Stretch: Begin in a half-kneeling position, with your back knee on the ground and front knee bent at 90 degrees․ Gently push your hips forward, feeling a stretch in the front of your hip․ Maintain a neutral spine and avoid arching your lower back․
Standing Hip Flexor Stretch: Stand tall and step one leg forward into a lunge position․ Keep your front knee over your ankle and gently press your hips forward․ You should feel the stretch in the front of the hip of your back leg․
Psoas Stretch (with support): Lie on your back with knees bent․ Gently pull one knee towards your chest while keeping the other leg flat․ This targets the deeper psoas muscle․ Hold each stretch for 30 seconds, repeating 2-3 times per side․
Consistent stretching is crucial for restoring proper muscle length and improving overall movement patterns․
Hamstring Stretches
Hamstring flexibility is often compromised in individuals with Lower Cross Syndrome, contributing to posterior pelvic tilt and exacerbating the imbalance․ A well-structured lower cross syndrome exercises PDF will emphasize hamstring stretching as a key component of rehabilitation․
Towel Hamstring Stretch: Lie on your back with one leg extended․ Loop a towel around the ball of your foot and gently pull back, keeping your knee as straight as comfortably possible․ Hold for 30 seconds, repeating 2-3 times per leg․

Standing Hamstring Stretch: Place one heel on a slightly elevated surface (like a step)․ Keeping your back straight, lean forward from your hips until you feel a stretch in the back of your leg․
Seated Hamstring Stretch: Sit with legs extended and reach towards your toes, maintaining a straight back․ Avoid rounding your spine․
Regular hamstring stretching helps restore muscle length, improve pelvic alignment, and alleviate tension contributing to Lower Cross Syndrome․
Chest Stretches
Tight pectoral muscles frequently accompany Lower Cross Syndrome, contributing to rounded shoulders and a forward head posture, further disrupting optimal biomechanics․ A comprehensive lower cross syndrome exercises PDF will invariably include chest stretches to counteract these imbalances․
Doorway Chest Stretch: Stand in a doorway and place your forearms on the doorframe, elbows bent at 90 degrees․ Gently lean forward until you feel a stretch across your chest․ Hold for 30 seconds, repeating 2-3 times․
Corner Stretch: Stand facing a corner, placing forearms on each wall․ Lean into the corner until you feel a stretch in your chest and front of your shoulders․
Supine Chest Stretch: Lie on your back with arms extended out to the sides, palms facing up․ Allow your chest to open up, feeling a stretch across the front of your shoulders․
These stretches improve posture and counteract the muscle imbalances associated with Lower Cross Syndrome․
Thoracic Spine Mobility Exercises
Reduced mobility in the thoracic spine (mid-back) is a hallmark of Lower Cross Syndrome, limiting rotation and contributing to compensatory patterns elsewhere in the body․ A well-structured lower cross syndrome exercises PDF will prioritize restoring movement to this region․
Cat-Cow Stretch: On hands and knees, alternate between arching your back (like a cat) and dropping your belly towards the floor (cow)․ This promotes spinal flexion and extension․
Thoracic Rotation: Seated with hands behind your head, gently rotate your torso to each side, keeping your hips stable․ Focus on movement originating from the mid-back․
Foam Roller Extension: Lie with a foam roller positioned horizontally across your mid-back, and gently extend backwards over the roller․
These exercises enhance spinal mobility, improving posture and reducing strain associated with Lower Cross Syndrome․

Foam Rolling & Self-Myofascial Release
Foam rolling targets tight muscles, a key component of a lower cross syndrome exercises PDF, releasing tension in glutes, hip flexors, and the thoracic spine․
Foam Rolling for Glutes
Gluteal foam rolling is a crucial element within a lower cross syndrome exercises PDF, addressing the often-underactive gluteus maximus and medius․ Begin by sitting on the foam roller, positioning it under one gluteal muscle․ Support your weight with your hands behind you․
Slowly roll back and forth, searching for tender spots – these are areas of muscle tightness or trigger points․ When you locate a tender area, pause and maintain pressure for approximately 30 seconds, allowing the muscle to release․
Focus on rolling across the entire gluteal region, including the upper, middle, and lower portions․ Repeat this process for 60-90 seconds per side․ Proper technique involves controlled movements and breathing deeply throughout the exercise․ This self-myofascial release technique helps restore optimal gluteal function, contributing to improved posture and reduced lower back pain․
Foam Rolling for Hip Flexors
Hip flexor foam rolling, detailed in many lower cross syndrome exercises PDF guides, targets frequently tight muscles contributing to anterior pelvic tilt․ Lie face down with the foam roller positioned under the front of your hip, near the hip crease․ Support your upper body with your forearms․
Slowly roll your hip forward and backward over the foam roller, searching for tender spots․ Pause on any particularly sensitive areas for 30 seconds, breathing deeply to encourage muscle relaxation․
Focus on rolling the entire length of the hip flexor muscles, from the hip joint to just above the knee․ Repeat for 60-90 seconds per side․ This technique helps release tension, improve hip mobility, and restore a more neutral pelvic position, alleviating lower back discomfort and improving movement patterns․
Foam Rolling for Thoracic Spine
Thoracic spine foam rolling, often illustrated in lower cross syndrome exercises PDF resources, addresses stiffness in the upper back, a common contributor to postural imbalances․ Lie on your back with the foam roller positioned horizontally across your upper back, just below your shoulder blades․
Support your head with your hands, keeping your knees bent and feet flat on the floor․ Gently roll your upper back up and down over the foam roller, focusing on areas of tightness․ Avoid rolling directly on your lower back․
Pause on tender spots for 30 seconds, breathing deeply․ This technique improves spinal mobility, reduces muscle tension, and promotes better posture, counteracting the rounded shoulders often seen in Lower Cross Syndrome․ Repeat for 60-90 seconds․

Integrating Exercises into a Routine
A lower cross syndrome exercises PDF will detail frequency; aim for 2-3 times weekly, adjusting sets and reps based on individual progress and tolerance․
Frequency and Sets/Reps

When implementing a routine based on a lower cross syndrome exercises PDF, consistency is paramount․ Initially, aim to perform the strengthening and stretching exercises 2-3 times per week, allowing for adequate recovery between sessions․ Begin with 2-3 sets of 10-15 repetitions for each strengthening exercise – glute bridges, quadruped hip extensions, planks, and bird dogs – focusing on proper form over quantity․
For stretching exercises, such as hip flexor and hamstring stretches, hold each stretch for 30 seconds, repeating 2-3 times․ As your strength and flexibility improve, gradually increase the number of sets, repetitions, or hold times․ Listen to your body and avoid pushing through pain․ A progressive approach, guided by the lower cross syndrome exercises PDF, is crucial to prevent injury and maximize results․ Remember to incorporate foam rolling as part of your warm-up or cool-down to enhance muscle recovery and mobility․
Progression and Regression
A well-structured lower cross syndrome exercises PDF will outline both progressions and regressions for each exercise, catering to varying fitness levels․ If an exercise feels too challenging, regress by reducing the range of motion, decreasing the number of repetitions, or modifying the exercise altogether․ For example, regress a plank to a knee plank․ Conversely, to progress, increase repetitions, add resistance (bands or weights), or advance to more complex variations․
Progression might involve transitioning from basic glute bridges to single-leg glute bridges․ Always prioritize maintaining proper form throughout․ The lower cross syndrome exercises PDF should emphasize gradual increases in intensity․ Pay attention to your body’s signals; pain indicates a need to regress․ Consistent, controlled progression, guided by the PDF’s recommendations, is key to long-term improvement and preventing setbacks․ Remember to reassess your posture regularly to track progress;